

Stained concrete floor restoration in Cardiff, with repair options
Cracks in polished concrete can be repaired, and surface marks or worn sealer may also be addressed through stained concrete floor restoration in Cardiff. The right treatment depends on the floor’s condition: hairline cracks can be filled with a polymer-modified cementitious compound, while larger cracks can be routed into a V-shape, cleaned and filled with a two-part epoxy.
Cracks or stubborn stains do not necessarily mean a concrete floor needs replacing. Careful assessment and preparation can often identify a practical way to restore its appearance and protect the surface.
This guide explains how restoration addresses cracks, stains and worn sealers, and what determines the choice of repair. It also covers polishing compared with protective coatings, routine care and signs that can help you decide what your floor needs.
The right approach depends on the concrete’s condition and the finish you want. The sections ahead explain the options and what restoration may involve, helping you plan your next step with a clearer understanding of the work.
Table of Contents
Benefits and maintenance of polished concrete
A polished concrete floor can provide a smooth, durable finish with straightforward routine care. Its performance depends on the slab’s condition, the finish selected and how the floor is cleaned.
Concrete floor durability and upkeep
Polishing compacts the surface, helping it withstand regular foot and vehicle traffic when properly finished. It needs little maintenance and does not require wax or coatings. For routine care, damp-mop with a neutral cleaner. Abrasive products and unsuitable chemicals can mark the finish or affect a separate protective sealer. Changes in sheen, new cracks or recurring damp patches may signal that the floor needs a closer look.
When choosing a Cardiff contractor, look for a clear assessment of the slab, a repair method suited to each defect and an explanation of the proposed finish. For structural repair work, BS EN 1504-3 covers structural and non-structural repair mortars, with classes R3/R4 for structural work, according to the British Standards Institution.
Restoring and maintaining floor shine
Polishing uses progressively finer abrasives to refine the surface and build the requested sheen. The process can continue until the desired shine is reached, from a restrained appearance to a more reflective finish. A polished floor may need re-polishing once every 8 to 10 years; regular neutral-cleaner mopping helps preserve its appearance between restoration work.
Moisture, uneven colour and sealer failure can all affect the result. Moisture may interfere with a protective sealer, while uneven colour can reflect differences in the concrete or its preparation. A failing sealer may look patchy or offer less protection, so assess the surface before applying another layer.
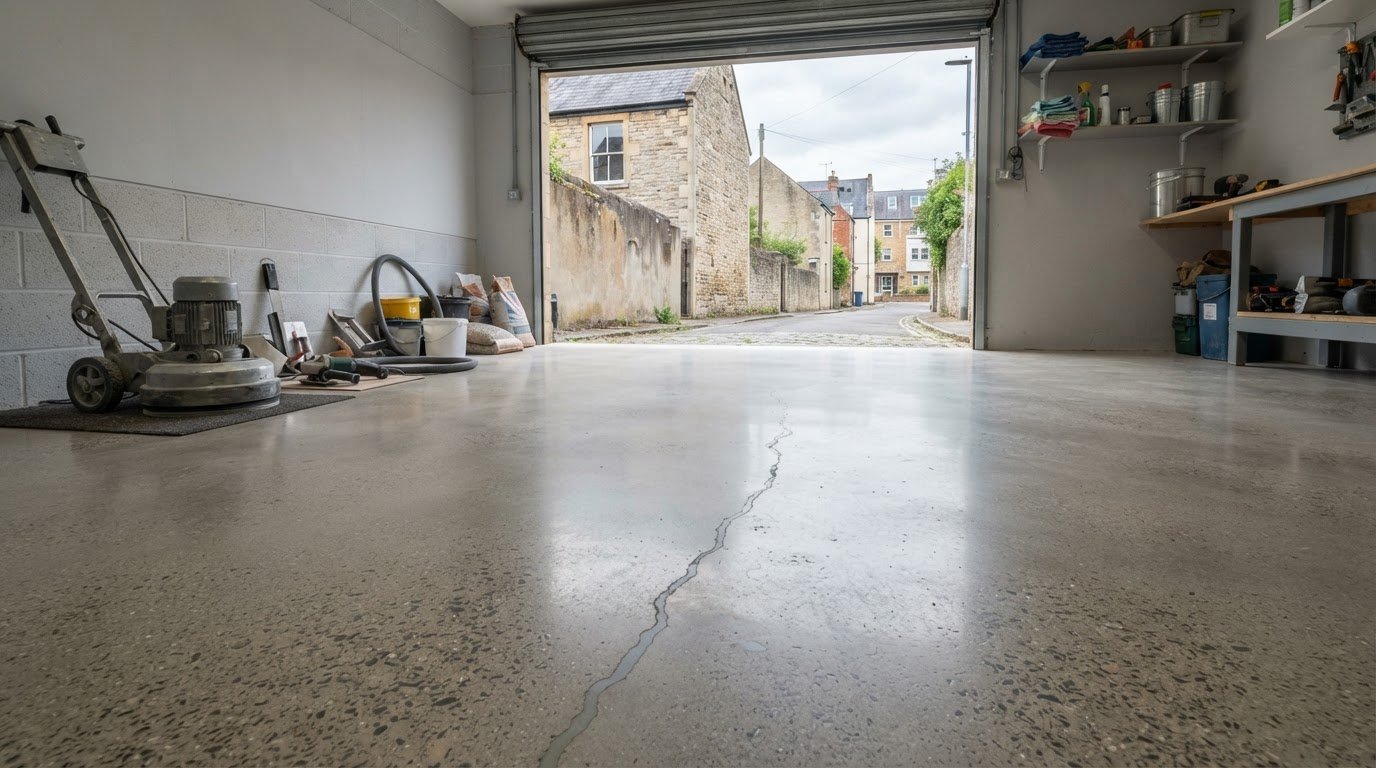
Small hairline cracks can be filled with a polymer-modified cementitious patching compound formulated for cured, hardened concrete. Larger cracks can be routed into a V-shape, cleaned and filled with a two-part epoxy. Matching the repair material and finish to the existing floor helps reduce visible contrast. Choose the repair based on the crack’s size and the surrounding concrete, rather than treating every line as a surface blemish.
Restored parquet needs a different maintenance routine. In high-traffic areas, restoration may be needed every 10 to 15 years; lower-traffic floors may last 20 years or more between restorations. After refinishing, light foot traffic may be allowed after 24 to 48 hours, depending on the finish. Wait up to 72 hours before moving furniture back, so the finish can fully harden.
Match cleaning to the floor’s surface instead of relying on one product for every material. On polished concrete, damp-mopping with a neutral cleaner is a practical routine. Do not add wax, which polished concrete does not require. Treat cracks or changes in sheen as reasons to review the floor’s condition and care.
Removing builders’ plaster, cement staining and old sealers
Builders’ plaster, cement residue, ingrained marks and failed sealers each need a suitable treatment. Identify the floor material and the type of contamination before removing deposits or preparing the surface.
Stained or damaged concrete can often be repaired without replacing the floor. The approach depends on whether the problem is surface residue, a stain, a failed sealer or damage within the concrete.
Treating stains on limestone and polished concrete
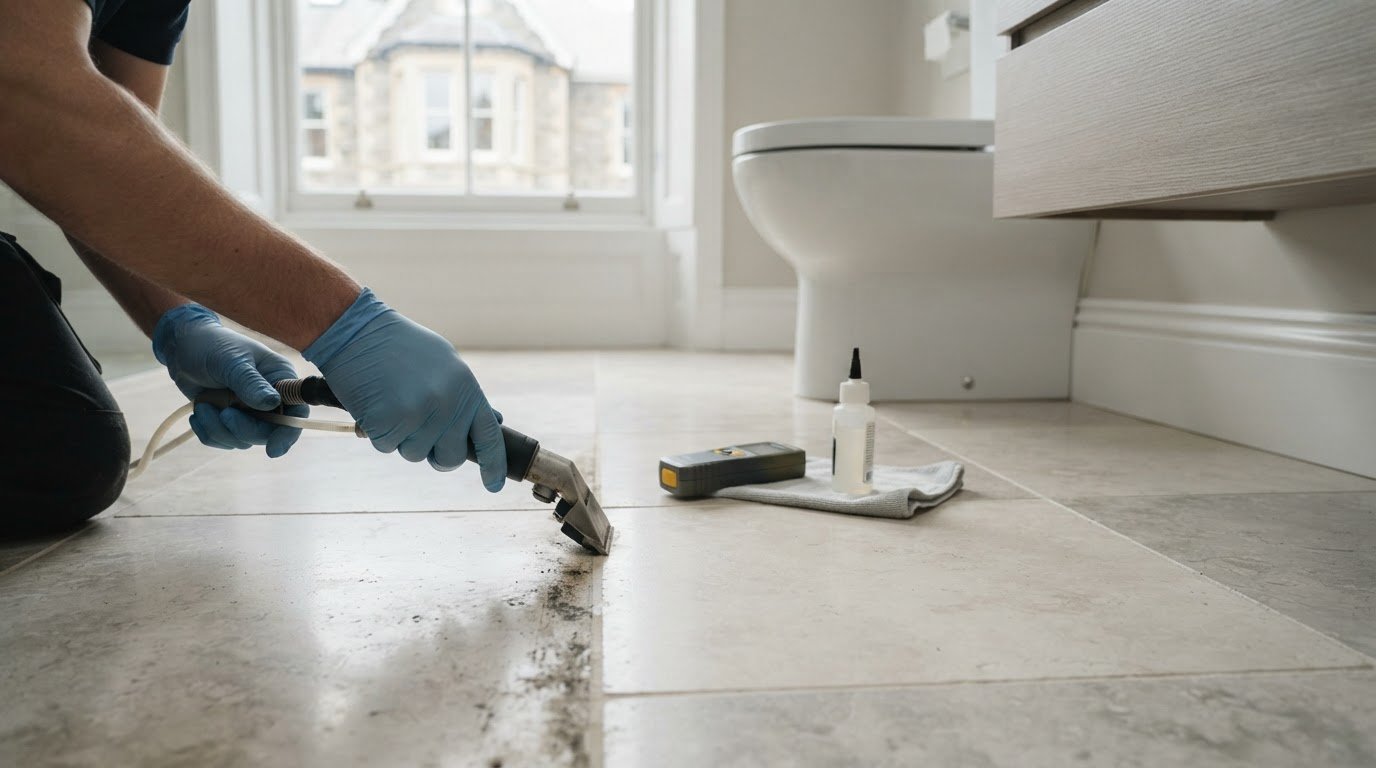
A Cardiff limestone kitchen floor had dark marks left by a kitchen dustbin. Its sealer had worn away over time, making the stains harder to remove. Treatment was repeated eight times, illustrating why a dark mark may need careful, repeated attention rather than one aggressive cleaning pass.
On polished concrete, first distinguish surface grime from a stain absorbed into the concrete. Oil and grease marks can often be treated with a concentrated alkaline cleaner or degreaser. Test a small, discreet area and follow the product directions. Limestone and concrete respond differently, so do not assume one cleaner is suitable for both.
Worn sealer and stain removal
A sealer forms a protective layer, but as it wears, the surface underneath becomes more exposed to spills and dirt. On the Cardiff limestone floor, the worn sealer made the dark marks harder to remove. Cleaning away residue without addressing remaining sealer can also leave a patchy appearance, so assess the whole affected area first.
Remove builders’ plaster and cement deposits carefully rather than scraping aggressively across the surface. Once the deposits are lifted, clean away residue and assess whether old sealer remains. Acidic supermarket tile cleaners can erode sealer on stone floors, so they are not a universal solution.
Assessing and preparing stained concrete
Start by identifying the floor type, the stain and the condition of the existing finish. Look for loose cement, plaster residue, cracks, uneven colour and areas where sealer has worn away. These checks help distinguish cleaning from repair or surface preparation, reducing the risk of an unsuitable treatment.
Reduxa stain-removal solution is one option for targeted stain treatment. Use it as directed for the relevant surface, taking the stain’s location and surrounding finish into account. Leave the treated area clean and ready for the next stage, rather than trapping cleaner or loosened residue beneath a new sealer.
Restoring, recolouring and sealing concrete
A practical restoration sequence is to remove surface contamination, prepare the concrete, repair cracks, then apply any selected colour treatment and sealer. The order matters: sealing before cleaning or repairs can trap residue and create an uneven finish. Allow the restored floor to dry for two days before applying sealer.
Recolouring can refresh the floor’s appearance, while a suitable sealer provides protection; neither replaces repairs to damaged concrete. Small hairline cracks can be filled with a polymer-modified cementitious patching compound. Larger cracks can be routed into a V-shape, cleaned and filled with a two-part epoxy, making restoration possible without automatically replacing the floor.
Concrete floor polishing in Cardiff and South Wales
Polishing transforms an existing concrete surface through controlled grinding, hardening and progressively finer refinement. The slab’s condition, preparation and intended use all influence the final appearance and performance.
For building-regulation questions in Cardiff or elsewhere in Wales, the scope matters: polishing an existing surface differs from altering structural elements or a building’s use. BS EN 1504-10 covers site application, substrate preparation and quality control for concrete repair work; it provides a technical reference, not a blanket answer to every building-control question.
The process typically uses an industrial planetary machine fitted with diamond or resin tools. The operator grinds the surface, applies a Beton hardener, then polishes with progressively finer tools. This sequence smooths and densifies the concrete, improving durability and wear resistance. The finish can be tailored to the space, with satin, gloss and high-gloss options.
Existing concrete affects the result. Where surface slurry hides the aggregate, removing 3-5 mm usually exposes it fully. That changes the floor’s appearance, so the depth of grinding should reflect the desired look and the slab’s condition. A trial area can help show how the aggregate and colour respond before the whole floor is treated.
Consider how the floor will be used before choosing a sheen. A properly finished polished floor can provide suitable traction for regular foot and vehicle traffic. Indoor spaces may benefit from a different level of reflection than work areas where visibility and ease of maintenance matter. Discuss the traffic, where dirt enters and which finish will be practical to clean.
Outdoor concrete needs additional planning. Adequate drainage slopes help prevent standing water, and penetrating sealers can protect against UV rays, road salts and de-icing chemicals while allowing vapour transmission. Indoors, the concrete slab’s temperature, rather than the material itself, determines how warm a polished floor feels underfoot.
Before work begins, consider these points:
Surface condition: cracks, old coatings and uneven areas affect preparation.
Aggregate exposure: grinding depth influences the finished appearance.
Use and traffic: footfall, vehicles and cleaning needs guide the finish.
Setting: drainage and exposure matter outdoors; slab temperature affects comfort indoors.
These considerations help determine the polishing sequence and finish. Careful preparation and quality control are essential for an even, durable surface across the floor.
What does stained concrete floor restoration involve?
Restoration should follow the floor’s condition, not a one-size-fits-all recipe. The process usually moves from inspection and cleaning to repairs, surface refinement and a suitable final treatment.
Inspect the concrete. Identify staining, cracks, worn sealer, loose material and changes in colour. Check whether marks sit on the surface or appear absorbed into the concrete. This helps distinguish cleaning from repairs or more extensive surface preparation.
Remove contamination. Lift dust, plaster, cement residue, grease and old surface treatments using methods suited to the material. Oil and grease stains can often be treated with a concentrated alkaline cleaner or degreaser. Remove cleaning residue before moving to repairs or finishing.
Repair cracks. Fill small hairline cracks with a polymer-modified cementitious patching compound formulated for cured, hardened concrete. For larger cracks, route the edges into a V-shape, clean the opening and fill it with a two-part epoxy for concrete repair.
Refine the surface. Grinding can remove surface imperfections and prepare concrete for polishing or another selected finish. The amount removed affects the appearance; removing 3-5 mm of surface slurry usually fully exposes the aggregate. The intended look and the slab’s condition guide this step.
Apply the final treatment. Choose polishing or a protective sealer according to the desired appearance and use of the space. A polished finish is developed with progressively finer abrasives. A sealer needs a clean, dry surface for an even application.
Colour treatments and sealers have different purposes. Recolouring changes the floor’s appearance, while a sealer forms a protective layer. Using both requires proper preparation and compatible treatments. Applying a new layer over dirt, old sealer or damp concrete can compromise the finish.
Repair depth also matters. A surface blemish may need cleaning, while a crack calls for a suitable repair material. BS EN 1504-3 covers structural and non-structural repair mortars, with classes R3/R4 for structural work, according to the British Standards Institution. The repair method should suit the defect and the role of the damaged area.
After cleaning, repairs and surface preparation, allow the floor to dry for two days before applying sealer. This gives the prepared surface time to dry before finishing. For outdoor polished concrete, drainage slopes help prevent standing water, while a penetrating sealer can protect against UV rays, road salts and de-icing chemicals while allowing vapour transmission.
Restoration can preserve a concrete floor without replacement when the surface can be cleaned, repaired and refinished. The decision depends on the concrete’s condition, the depth of damage and the finish required. A clear sequence, from diagnosis through drying, helps prevent one stage from compromising the next.
How do contractors assess and prepare stained concrete floors for restoration?
A sound restoration plan starts by identifying the concrete’s condition and the cause of each visible defect. This links cleaning, repair and finishing to the actual floor, rather than treating every stain or crack alike.
The first inspection identifies stains, cracks, surface wear, old coatings and uneven colour. Their position and appearance can help distinguish surface contamination from absorbed staining or physical damage. A greasy patch, for example, needs different preparation from loose cement residue. The floor’s intended use also matters, because traffic affects the required finish.
Next, prepare the surface for close inspection and treatment. Dust, loose debris, plaster and cement deposits can obscure the concrete, so remove them using methods suited to the surface. Check old sealer too: remaining patches can affect how a new treatment adheres and looks. Preparation should leave the substrate clean, consistent and ready for the specified repair or polishing process.
Assess cracks by their size, position and surrounding condition. Small hairline cracks can be filled with a polymer-modified cementitious patching compound formulated for cured, hardened concrete. Larger cracks can be routed into a V-shape, cleaned and filled with a two-part epoxy. Match the repair material to the defect and intended work instead of simply covering the visible line.
BS EN 1504-10 covers site application, substrate preparation and quality control. In practice, that focus means considering how repairs are applied and checking the prepared surface before finishing. Structural and non-structural repair mortars are covered by BS EN 1504-3, with classes R3/R4 for structural work, according to the British Standards Institution.
Before restoration proceeds, clarify the intended outcome: stain removal, crack repair, a polished surface or added protection. A trial treatment in a discreet area can show how the concrete responds and reveal differences in colour or aggregate. It also provides a reference for the finishing process, rather than relying on assumptions about the entire floor.
Record defects: note the location and type of each stain, crack or worn area.
Prepare methodically: remove residue and old treatments that interfere with the next stage.
Match repairs: select materials and methods according to crack size and floor condition.
Review the surface: check cleanliness and consistency before polishing or sealing.
For a considered assessment and concrete floor preparation in Cardiff, arrange a restoration assessment.
Restore-A-Floor: Wood Floor Sanding & Refinishing
Restore-A-Floor’s Concrete Floor Polishing can refine a concrete surface after preparation and repairs. If the floor is timber, Wood Floor Sanding & Refinishing may be the suitable service; parquet and tiled floors have their own restoration and installation options. Restore-A-Floor provides bespoke flooring solutions for residential and commercial properties across Cardiff, Swansea, Bristol, Pembrokeshire, Haverfordwest and Cardiganshire.
Before deciding on the next step, consider the floor material, visible damage and finish you want. This helps match the work to the surface, whether you’re addressing stained concrete or renewing another floor type.
Contact Restore-A-Floor to discuss your flooring project.
Choose the finish that fits your space
Decide what you need the floor to do as well as how you want it to look. A home entrance, commercial workspace and outdoor area place different demands on concrete, so consider traffic, cleaning and preferred sheen together. This gives the restoration plan a clear purpose, rather than making appearance the only measure of success.
For stained concrete floor restoration in Cardiff, Restore-A-Floor’s Concrete Floor Polishing can help renew the surface. If your project involves timber or parquet instead, Wood Floor Sanding & Refinishing and Parquet Floor Supply & Installation address those different materials.
Take the next step with a clear idea of your floor’s condition and desired finish. Contact Restore-A-Floor to discuss your floor, and move towards a finish suited to your space.
Frequently Asked Questions
Can cracks in polished concrete be fixed?
Yes, cracks in polished concrete can be repaired, although the repair may remain visible. The approach depends on the crack’s size, position and condition. Consider whether it is isolated or part of wider surface damage before choosing a finish. A repaired area may reflect light differently from the surrounding concrete, so discuss the expected appearance as well as the repair material.
Can I choose the level of sheen?
Yes, you can choose a satin, gloss or high-gloss finish. Consider the room’s natural and artificial lighting, as reflections change how the floor looks throughout the day. Also think about how you use the space and the appearance you prefer. A less reflective sheen creates a different effect from a high-gloss surface, so choose for the actual setting.
Can I walk on the floor immediately after restoration?
No. Do not assume the floor is ready for foot traffic as soon as the work ends. Keep people off until the final treatment has dried or cured, and follow the re-entry guidance for that finish. Polished concrete and a newly applied sealer have different finishing stages. Keep footwear, furniture and cleaning equipment off the treated area during this period to protect the result.
Which Cardiff companies specialise in stained concrete floor restoration?
Restore-A-Floor provides Concrete Floor Polishing in Cardiff. For stained concrete floor restoration, describe the floor’s condition and whether the work involves polishing, surface preparation or repairs. Details such as stain locations, visible cracks and the finish you want help define the project. Restore-A-Floor serves Cardiff as well as Swansea, Bristol, Pembrokeshire, Haverfordwest and Cardiganshire.
How long does concrete floor restoration take and when can the floor be used again?
Timing depends on the floor’s condition, repairs required, preparation and final treatment. Fast-setting epoxy systems for industrial repairs typically cure in 2-6 hours; deep-fill epoxy mortars may need 12-24 hours, depending on temperature and depth. Those curing periods don’t automatically mean the whole floor is ready for use. Access also depends on the finishing materials and the work sequence.
How should restored stained concrete floors be cleaned and maintained?
Use a soft brush or dust mop to remove loose grit before damp cleaning, as grit can scratch the finish underfoot. For routine washing, use a neutral cleaner and only enough water to clean the surface. Wipe up spills promptly, particularly oil or grease. Avoid harsh or acidic products, which can damage a surface treatment.
Comments